
Creating a New Queue
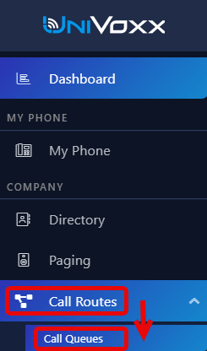
1) Navigate to the ‘Call Routes’ menu, then the ‘Call Queues’ sub menu.
2) Select the ‘add’ button.

3) Listed below are the various call queue settings.
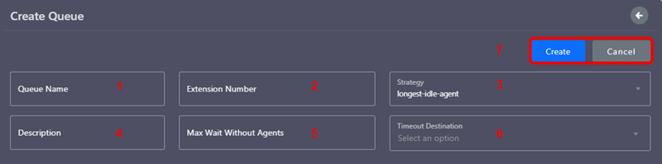
1 - Name: This is the identification for the call queue.
2 - Extension Number: A unique extension number to route and ID the call queue.
3 - Strategy: This option dictates how calls are routed to agents from the queue.
4 - Description: More information on what the call queue is used for.
5 - Max Wait W/O Agents: The amount of time the caller will wait in the queue until the call is forwarded to the timeout destination.
6 - Timeout Destination: The last resort routing option.
7 - Create/Cancel: Select ‘Create’ to finish creating the call queue.
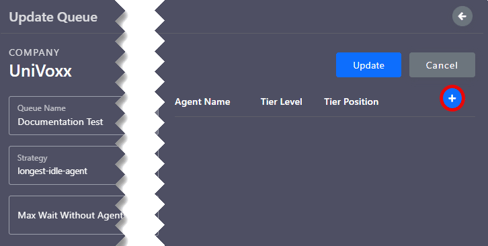
4) The final step is to add the agents that will be assigned calls from this queue. Navigate back to the ‘Call Queue’ page.
5) Select the ‘add’ button in the ‘agents’ section.
6) Listed below are the various options for setting each agent.
1 - Select the phone of the agent.
2 - The higher the tier, the higher priority that user has in the queue.
3 - The higher the tier position, the higher priority that user has in the tier level.
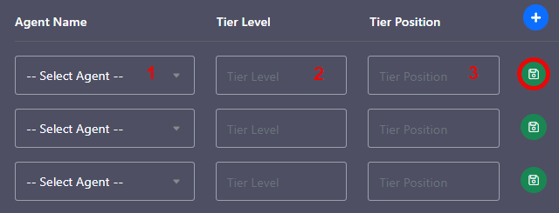
7) Select the green save button to apply the changes.
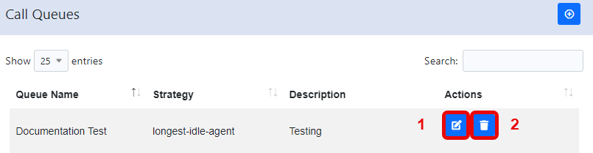
Editing/Deleting Call Queues
1) Navigate to the ‘Call Routes’ menu, then the ‘Call Queues’ sub menu.
2) There are two buttons next to each call queue. Select the edit button.
1 - Edit
2 - Delete
3) All settings for the call queue can be edited here.
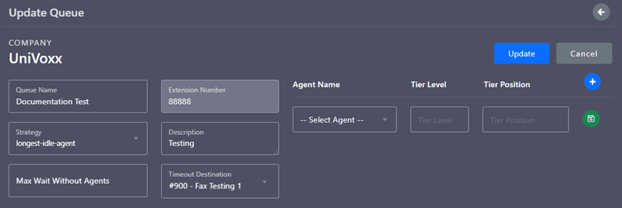
4) Select ‘Update’ at the end to commit any changes.