
General Notes
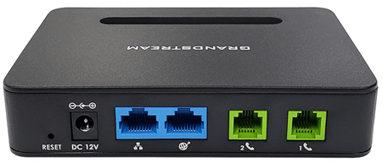
- Does our device have power and internet connections? See below for the connection guide.
- Does the fax machine have toner and a printer? This is necessary for inbound faxing to work.
- Are you having issues with inbound faxing, outbound faxing, or both?
- Restart the fax machine, if that has not been completed already. This sometimes will reset the signal between our device and the fax machine.
- Ensure nothing is plugged into the EXT port of the fax machine as this is known to cause issues with some fax machines.
-
Before contacting support, please note the lights on our device and whether they are blinking or not. This information will assist with the investigation. Additionally, power cycle our device by simply unplugging the power cable, waiting until it powers off, then plugging it back in.
Unable to Send or Receive Faxes
4. Restart the fax machine.
5. If the fax machine is still unable to send and/or receive faxes, gather any error pages that have printed off and contact us at support@univoxx.com.
Unable to Receive Faxes, But Able to Send Faxes
1) Confirm the UniVoxx ATA is online.
4) Confirm that the phone number used for the fax machine is still with UniVoxx and that it has not ported away to another carrier. UniVoxx can assist with this step.
5) Try calling the fax phone number and seeing if you hear a fax tone or receive some other type of response/error message that might assist UniVoxx with troubleshooting.
6) If the fax machine is still unable to receive faxes, gather any error pages that have printed and contact us at support@univoxx.com.
Unable to Send Faxes, But Able to Receive Faxes
- Review the error codes in the transmission report and troubleshoot accordingly.
- Ensure the fax machine does not have Fax to Server enabled.
To disable Fax to Server on a Brother MFC-9970CDW:
1. Press Menu.
2. Select LAN or Network and Fax to Server.
3. Select Off and then press OK.
4. Press Stop/Exit.
Faxing Takes Multiple Attempts
1) Confirm the UniVoxx ATA is online.
Adjusting the Transmission Rates and ECM (Error Correction Mode) Settings
For instructions on how to adjust the BAUD (transmission) rates and ECM settings (Error Correction Mode) on a specific fax machine, please select the corresponding model below.
HP 2000, 4100, 5000, 6000 & 6100 Model OfficeJet Series
HP Officejet 9100 All-in-One Series
HP 6100xi, HP7410xi and HP PSC2210 Series
HP 7000 Model OfficeJet Series
To Set the Transmission (BAUD) Rate for the Brother FAX-2840
- Press the Menu or Menu/Set key. Then select Fax, Miscellaneous and Compatibility.
- Press the Up or Down key until you can select Basic. Basic reduces the modem speed to 9600 bps.
- Press OK or Menu/Set or Set key.
- Press Stop/Exit.
To Set the Transmission (BAUD) Rate for Other Brother Fax Models
- Press the Menu/Set key the Press 2, then 0, then 1.
- Use the Up or Down Arrow key and then select Basic.
- Press the Menu/Set key and then Press the Stop or Exit Key.
To Set the Transmission (BAUD) Rate for the HP 3180/3100 Series
- Press the Fax Menu Button.
- Press Fax Menu repeatedly to scroll through the options in the Fax Menu.
- Press Setup, select Advanced Fax Setup, and then press Fax Speed.
- Using the arrow keys select the option Slow (9600), and then press OK.
To Set the Transmission (BAUD) Rate for the HP M2727 MFP Series
- Press Setup.
- Press and Hold the Right Arrow then Press Cancel.
- Press Setup again until the Developers Menu displays, then press OK.
- Select R/W Parameters by using the Right Arrow, then press OK.
- Enter 153 on the keypad (you should see T30XMIT), then press Enter.
- Using the keypad Press 16 then Press Enter.
To Set the Transmission (BAUD) Rate for the HP4110
- Press the * and # keys at the same time.
- Press and Hold the Right Arrow then Press Cancel.
- Press 1, then 2, then 3. (Release each key before pressing the next.)
- Service should now display, press the right arrow button until R/W parameters appears. Then press Enter.
- You should see parameter 0. Press 2, then Enter.
- Next press Cancel repeatedly until you exit the service menu.
To Set the Transmission (BAUD) Rate for the HP-4219
- Navigate to the Advanced menu. First, go to Setup, then press 4 for Advanced Fax Setup.
- Then Select Slow Setting.
- Save the Settings.
To Set the Transmission (BAUD) Rate for the HP Officejet 9100 All-in-One Series
- Press and hold the * key for 3 to 5 seconds until the display screen reads Test -001+.
- Enter 620 on the keyboard and press the Check Mark so the screen reads Cfg param id:.
- Enter parameter 159 for the receiving baud rate on the keyboard, then press the Check Mark so that Cfg param val: 26 displays.
- Enter the value 6, which equals 9600 (V.29), then press the Check Mark.
- The screen will read Test -001+.
- Press the Reset button until you return to Ready*.
- Repeat the steps, entering parameter 153 for the transmitting fax baud rate.
To Set the Transmission (BAUD) Rate for the HP 6100xi, HP 7410xi and HP PSC2210
- Press the * and # keys at the same time.
- Press 1, then 2, then 3. (Release each key before pressing the next.)
- The display should show Service. Press the right arrow button once, and System Configuration should display. Press Enter.
- Press the right arrow button until R/W parameters appear. Then press Enter.
- You should see parameter 0. Press 153, then Enter. (Parameter 153 is for sending. The parameter for receiving is 159.)
- Press 2, then Enter.
- Next press Cancel repeatedly until you see the date and time display.
Brother MFC-420CN
This multifunction Brother machine has a normal fax BAUD rate of 14400. Use the following steps to set the machine to a basic setting, which will lower the BAUD rate to 9600 and disable ECM.
-
Press the Menu or Menu/Set key, then select Fax, Miscellaneous, and Compatibility.
- Use the Up or Down arrows to select Basic.
- Press OK or Menu/Set or the Set key.
- Press Stop/Exit.
Sharp Fax Machines
The following Sharp fax machines are set to a 9600 baud rate and will automatically fall back to a lower baud rate depending on the other machine’s capabilities.
UX 510
UX 460
UX P100
UX P115
UX P200
Note: These Sharp fax models do not have an ECM setting. As they are already set to 9600 bps, they should work. Remember to set the resolution to Standard and ensure your connection is set to G711 if you are experiencing difficulties with any of these Sharp fax models.
Lowering the Baud Rate and Disabling ECM on a Canon C-855
- Press Function.
- Press Data Registration.
- Press the Up or Down arrow until Fax Settings appears, then press Set.
- Press the Up or Down arrow to navigate to the submenus.
- First, choose TX Settings (for sending faxes).
- Select TX Start Speed, then choose 9600 bps.
- Select ECM TX, then choose OFF. This will disable ECM while sending a fax.
- Next, select RX Settings (for receiving faxes).
- Select RX Start Speed, then choose 9600 bps.
- Select ECM RX, then choose OFF (this will disable ECM for receiving a fax).
- Press Stop to exit.
Lowering the Baud Rate and Disabling ECM on a Canon imageCLASS D780
-
Under User Settings, navigate to TX Settings, which sets the transmission functions of the fax. Set ECM TX to OFF.
-
Under User Settings, navigate to RX Settings, which sets the receiving functions of the fax. Set ECM RX to OFF.
-
Under User Settings, navigate to Tel Line Settings, then set TX Start Speed to 9600 bps.
-
Under User Settings, navigate to Tel Line Settings, then set RX Start Speed to 9600 bps.
Disable ECM For Most HP 7000 Model OfficeJet Series
- Press Setup
- Press the Down Arrow until Advanced Fax Setup displays.
- Then hit OK.
- Press the Down Arrow until Error Correction Mode displays.
- Then hit OK.
- Press the right arrow until OFF displays. Then hit OK.
Disable ECM For Most HP 2000, 4100, 5000, 6000 & 6100 Model OfficeJet Series
-
From the front panel, press Menu.
-
Press the Right Arrow until Advanced Fax Setup displays, then press Enter.
-
Press the Right Arrow until Error Correction Mode displays, then press Enter.
-
Press the Right Arrow until Error Correction Mode Off displays, then press Enter.
Disable ECM for HP Officejet 7300/7400 Series
- Press Setup.
-
Press 5, then press 6. (This will display the Advanced Fax Setup menu and select Error Correction Mode.)
-
Press the Down Arrow to select Off (or On, if needed).
- Press OK.
Disable ECM for HP 3180/3100 Series
- Press the Fax Menu Button.
- Press Fax Menu repeatedly to scroll through the options in the Fax Menu.
-
Press Setup, then select Advanced Fax Setup, and then select Error Correction Mode.
-
Select Off, then press OK.
HP MFP E52645 Series
-
From the Home screen on the printer control panel, navigate to the Settings application, then select the Settings icon.
- Open the following menus:
● Fax
● Fax Send Settings
● Fax Dialing Settings - Configure the Fax Send Speed to Slow (v.29-9.6k).